 |
| Original Photo (Spring) |
STEP# 01: Go to Adobe Photoshop and open the photo that u wanna edit.
STEP# 02: Go to your Layers palette and create a new Adjustment Layer > Hue/Saturation.
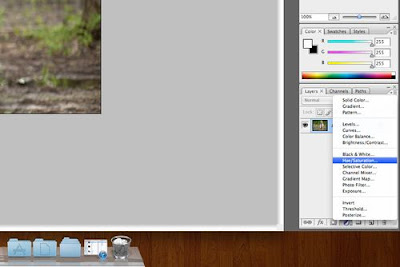 |
| Step# 02 |
STEP# 03: Most people know how to use Hue/Saturation to make a black and white photograph, but what some do not know or have not ventured to find is that you can use the drop down and only modify specific colors. For this effect we want to effect the green leaves. To do this you actually need to select the Yellows (not greens) as most of the perceived greens are actually yellow.
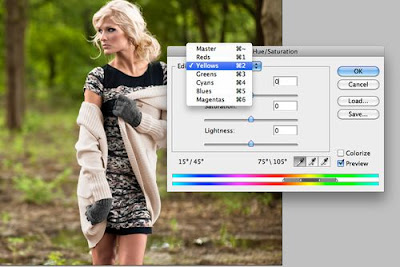 |
| Step# 03 |
STEP# 04: Now depending on your image adjust the Hue slider to taste until you get a nice warm color on your leaves. Don't worry about how it effects the subject we will restore that in the next step. As you can see if you slide around you can turn the leaves any color you want (go crazy) but for my effect I've put Hue at -41 for a nice warm autumn color.
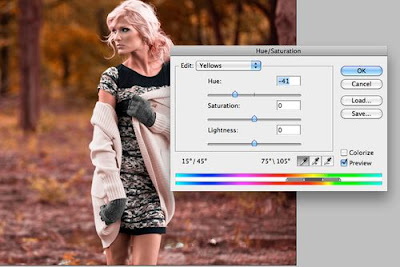 |
| Step# 04 |
Step# 05:
Because you created an Adjustment Layer we can "mask" out the effect and restore the natural color to her skin and to her hair. If your not familiar with layer masks they are pretty powerful. On your Hue/Saturation Adjustment Layer go to your paint brush and using a black color start painting in the areas that you want to restore the natural color. See? You are now masking out the effect in the local areas that you paint black. Whoops did you mask out too much? Switch from black to white and with white you can paint back in the effect. You may want to zoom in to be precise.
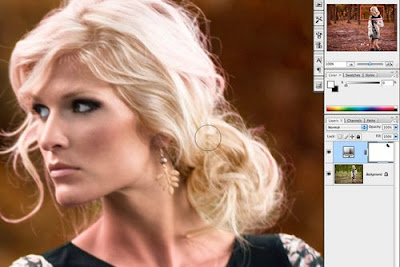 |
| Step# 05 |
Step# 06: That's it!
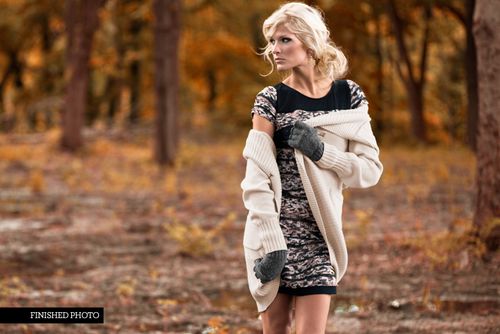 |
| Edited Version (Autumn) |
Thanks for visiting, Must Like and Share and Follow!!!!!


No comments:
Post a Comment